Resources
Three Ways to Export Files from Syntelic
Views in Syntelic can be exported through a few different processes. Below are some of the basic steps for the various ways that data can be exported out of Syntelic.
EXPORT A TABLE
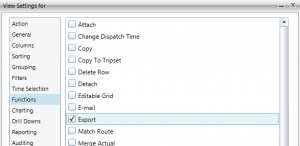
- Create an action and check the Export Function so that it is selected under the Functions tab.
2. Run the report and select the Export icon  .
.
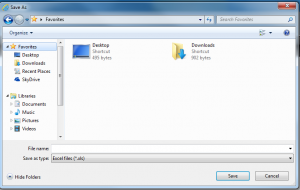
3.Enter the name, location, and format (csv or excel) for the file.
RUN VIEW AS AN EXPORT
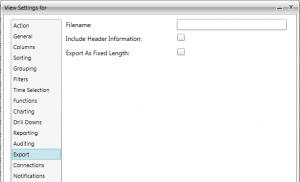
- Create an action view and under the Export tab, enter the following info:
-
-
- Filename: the name and location of where the file should be exported to. *Please note that the export file path should be a network location.
- Include Header Information: Should the file include its header columns?
- Export As Fixed Length: Should the file have a fixed formatted length?
-
2.Manually run the action and it will export under the name and location specified.
THROUGH TASK SCHEDULER
- Create an action view and under the Export tab, enter the following info:
- Filename: the name and location of where the file should be exported to.
- Include Header Information: Should the file include its header columns?
- Export As Fixed Length: Should the file have a fixed formatted length?
2. Open Task Scheduler and Create a New Task:
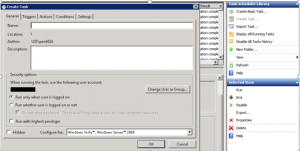
3. Enter the Name of the action, a description if preferred, and if there is a preference to run the action when the user is logged on.
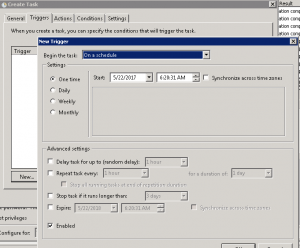
4. Under Triggers, enter the time and how frequent the action should run for.
5. Under Actions, select “Start a program” and enter the file path to Synlink:
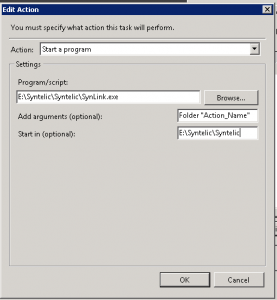
6. For Program/script, enter the path to the SynLink.exe action and under Add arguments enter the following parameters:
-
- The first parameter is Folder; the folder name that the export action is in.
- The second parameter is Action Name; the name of the export action.
- The third parameter is Division; the name of the division the export action is in.
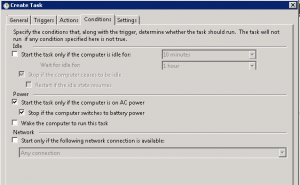
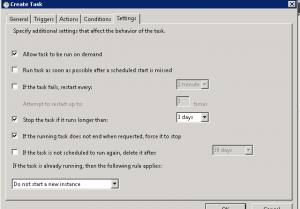
7. For Conditions and Settings, enter the preferences: